I created slides on Microsoft PowerPoint and had an issue with being able to put them onto my blog therefore to do this I had to sign up to ‘slideshare.net’. It is a simple and useful website to use, all I had to do once signed up was click on the upload button as displayed above, and then select the two slides I created; one was on textual analysis of music videos and then the second on controversial music videos as shown below. All were a part of the research and using this website was a much more interesting and different way to present my work than have it all in paragraphs, a slide show is easier to read and work also.

One of the more advanced things to do on the powerpoint was create hyperlinks that link to the actual video, I could have put the video itself up but it would have been to small and not have worked when uploaded onto slideshare. All you have to do is highlight the words you want hyperlinked, press insert and then hyperlink once you have done this you simply type in the address of the video.

Planning:
In the planning stages of the project all I had to do was send an email to the managers of Paramore asking permission to use their song and upload some videos onto blogger so that they can be viewed easily.
Preparation:
Something new, and a media technology that I used in the project was a program called 'Comic Life' on which you can create storyboards and comic strips. This was useful because I was able to display how I wanted the video to look or at least my ideas that I can refer back to.

On it I could chose from the different layouts instead I created my own, and then inserted all the images and text to create a proper storyboard.
Production:
I used a professional camera borrowed from Photography class in school to take pictures of different scenery of where to film. Another piece of hardware is the camera and tripod used to film the video, I was able to have the camera in all different heights and positions to get the types of shots that I wanted and it remained steady because of the tripod.
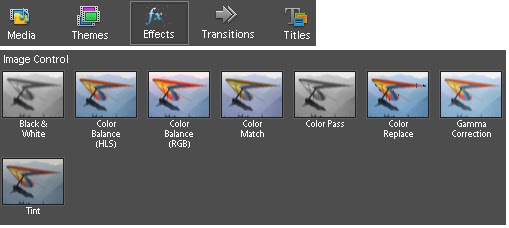
To then edit the video I used 'Adobe Premiere Elements' a video editing software. I was able to contort and edit the video using all the different effects and here it shows how I changed one of the scenes to black and white:
This was effective because it makes her looks confused as when she runs there is a trail of herself behind her and I think matches well to this genre as it is spooky and haunting like what is typically linked to rock music or slow ballads.


To add the audio I had to put the song onto a memory stick and upload it onto a computer then I was able to transfer it onto 'Premiere Elements'. The small audio button is selected like below and then once the audio appears, here it is titled '10 Misguided Ghosts' and then simply right click and 'Insert to Timeline' or drag it down and then it becomes a part of the video and can be edited itself to fit next to the parts of the video best suited, for example when the girl writes the lyrics onto the paper I have the audio basically matching it.

Final Video:
I had to set up an account on youtube and then upload my video via that so that it could be uploaded onto my blog or linked from my blog. It is quite simple, all I had to do was click on upload then find the file with the video in and let it upload.

Ancillary Tasks:
For all of the ancillary tasks I used Microsoft Photodraw V2 because it had the best facilities to create the things I wanted.
To make the CD I had to cut out a circle in the image below.


No comments:
Post a Comment